
Starting a Sale
Open a new cart and begin a customer transaction.
A sale in the In-Store App is built inside a cart — an active order that collects items, customer details, and payment before checkout. At any time, one cart is selected as the active cart and is accessible via the cart panel. Previous carts remain available from the Carts list so you can park and resume transactions across shifts.
Opening the cart panel
The cart panel is the main workspace for any transaction. Access it by tapping the shopping cart floating action button (FAB) at the bottom-right of the screen. A red badge on the FAB shows the number of items currently in the active cart.
The panel slides up and occupies almost the full screen height. It can be swiped down to minimise.
Reading the cart panel
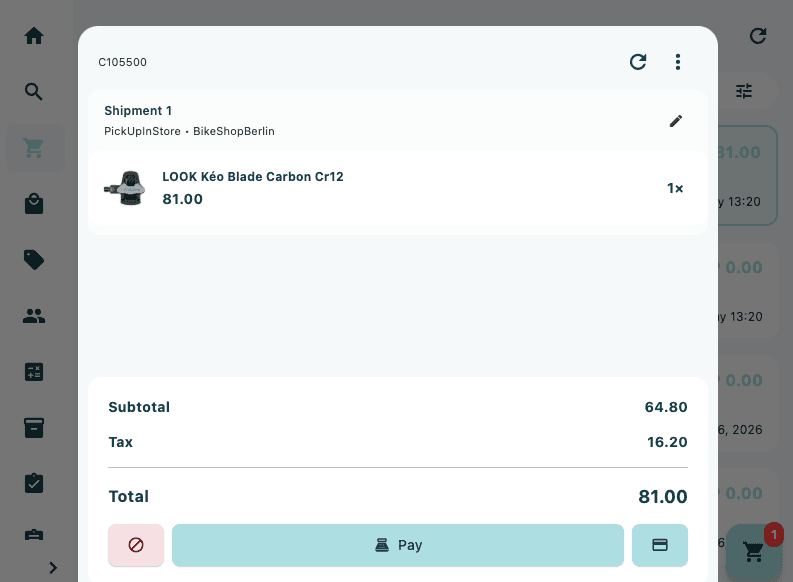
The cart panel is divided into three areas: a header, an item list, and an order summary.
Header
| Element | Description |
|---|---|
| Cart title | Shown in bold on the left |
| Cart ID | Shown in small grey text next to the title |
| Refresh icon | Reloads cart data from the server |
| Overflow menu (⋮) | Additional cart actions |
Item list
Products added to the cart appear as a scrollable list grouped by shipment. When the cart is empty, the list shows No items in cart.
Order summary
Below the item list, the order summary shows:
| Row | Description |
|---|---|
| Discounts | One row per applied discount, shown in green (negative values) |
| Shipping | Shown only when a shipping cost is applied |
| Subtotal | Sum of all line items before tax |
| Tax | Applicable tax amount |
| Total | Final amount due |
A Pay button sits below the summary. See Checkout with Payment Terminal for the full payment flow.
Cart validation
After each change to the cart, the server validates it and the result appears just above the totals:
| Display | Colour | Effect |
|---|---|---|
| Blocking error | Red box with error icon | Pay button is disabled until the error is resolved |
| Non-blocking warning | Orange box with warning icon | Informational only — payment is not blocked |
Resolve any blocking errors before proceeding to payment.
Starting a new cart
When you serve a new customer, start a fresh cart so the previous transaction is kept separate.
- Tap the shopping cart FAB to open the cart panel.
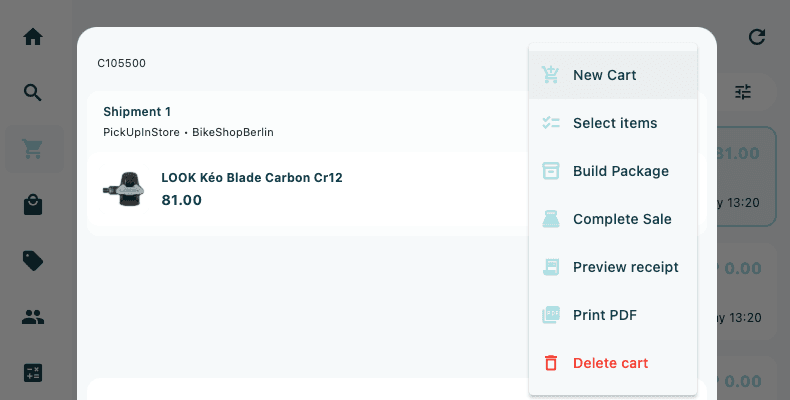
- Tap the overflow menu (⋮) in the top-right corner of the panel.
- Tap New Cart.
- The current cart is stashed — a Cart stashed successfully notification confirms this. The cart remains accessible in the Carts list.
- The cart panel clears and shows No items in cart, ready for the new transaction.
Stashing a cart does not delete it. The previous cart is saved and can be resumed from the Carts list at any time. See Parking and Resuming a Cart for details.
Resuming a saved cart
If you have a cart from an earlier session — for example, a layaway, a special order, or a cart parked for another staff member to finish — you can select it directly from the Carts list.
- Navigate to the Carts list in the Sales & Checkout section.
- Use the search bar (placeholder: Search carts…) or filters to locate the cart.
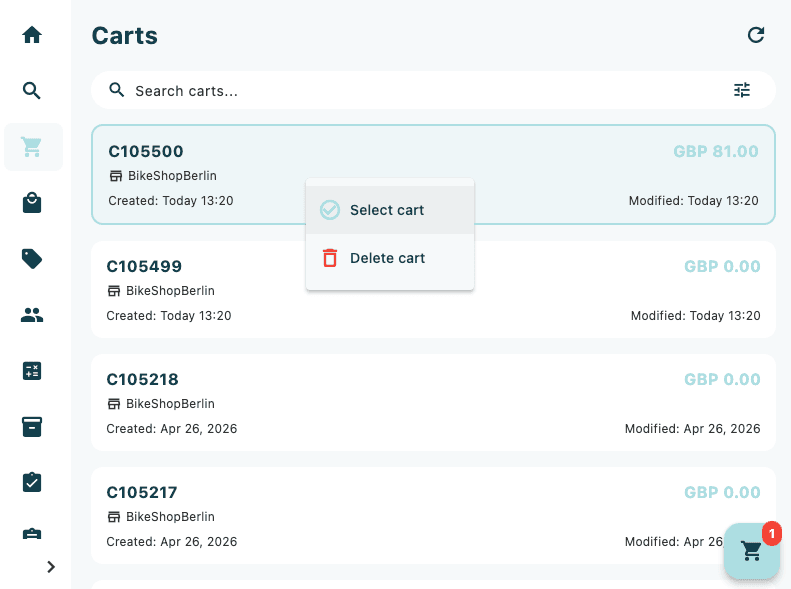
- Tap the cart card to open the context menu.
- Tap Select cart.
- The cart becomes the active cart. Tap the shopping cart FAB to open it in the cart panel.
The selected cart is highlighted with an accent-coloured border in the list to show it is active.
The Carts list
The Carts list shows all saved carts for your store. Each card displays:
| Element | Description |
|---|---|
| Cart ID | Shown in bold |
| Total | Grand total in the accent colour |
| Customer name | Shown with a person icon — only when a customer is attached |
| Store | Store name with a store icon |
| Created | Creation date and time |
| Last modified | Shown when different from the creation date |
Dates are shown as Today HH:mm or Yesterday HH:mm for recent carts, the abbreviated weekday for carts within the past seven days, and the full date for older carts.
Tap the filter icon to the right of the search bar to filter carts by status, date range, or other criteria. Active filters are shown as chips below the search bar.
Deleting a cart from the list
Deleting a cart cannot be undone. All items and payment records in the cart are permanently removed.
- Tap the cart card in the Carts list.
- Tap Delete cart (shown in red) in the context menu.
- Confirm the deletion in the dialog that appears.
What to do next
Once the cart panel is open and empty, add products to begin the transaction:
- Adding Items by Scan — use the camera or a hardware barcode scanner
- Adding Items by Search — search by product name, SKU, or EAN
- Adding a Customer to the Sale — attach a customer record before or after adding items