
Building a Package
Combine multiple products into a configured package on the cart.
The In-Store App supports two types of packages on the cart. The Package Builder is a three-step wizard for assembling a custom ad-hoc package from any combination of products — useful for gift sets, repair kits, or any bundled offer not defined in the product catalogue. For pre-configured bundle products from the catalogue, the Configure Package dialog lets you select the correct variant for each component slot before breaking the bundle down into individual lines.
Building a custom package
Opening the Package Builder
- Open the cart panel (tap the shopping cart FAB).
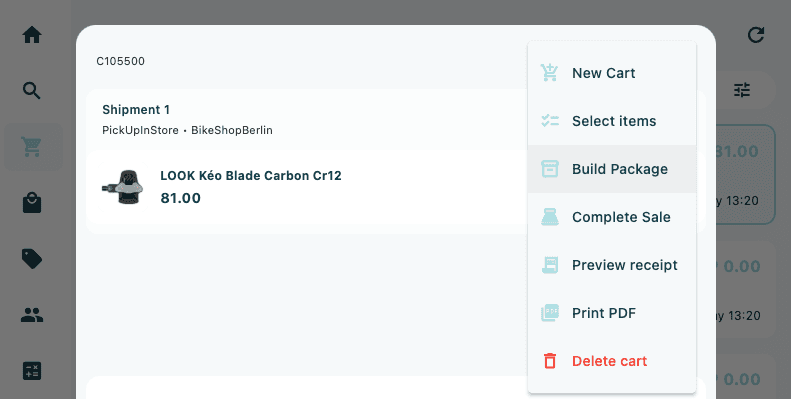
- Tap the overflow menu (⋮) in the top-right corner of the cart panel.
- Tap Build Package.
- The Build Package dialog opens. Three step dots in the header show your progress through the wizard.
Step 1 — Add components
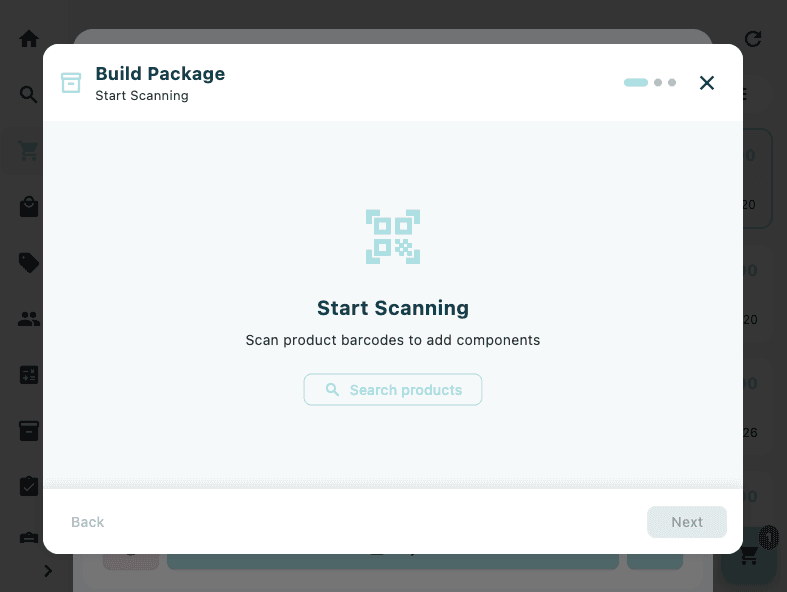
The first step is labelled Start Scanning in the dialog header.
When no components have been added yet, the step shows a large QR code scanner icon, the heading Start Scanning, and the hint Scan product barcodes to add components. Two buttons are shown below the hint:
| Button | Description |
|---|---|
| Search Products | Opens a full-screen product search overlay inside the dialog |
| Camera icon | Opens the camera barcode scanner (mobile only, Android/iOS) |
Adding products by hardware scanner:
While the Build Package dialog is open, the hardware barcode scanner is automatically routed to the package builder. Scanning a product barcode adds it as a component immediately.
Adding products by camera (mobile only):
Tap the camera icon button to open the Scan Barcode camera scanner. Scan a product barcode — the dialog finds the product and adds it to the component list.
Adding products by search:
Tap Search Products to open the product search overlay. Tap a product to add it. If the product has multiple variants, a variant selection sheet appears — select the correct size or colour to add that specific variant.
If the scanned or searched code cannot be matched, an error notification is shown.
Scanning or searching a duplicate SKU increments that component's quantity instead of adding a second line.
Reading the component list:
Each added component appears as a card showing:
| Element | Description |
|---|---|
| Product image | 40 × 40 thumbnail |
| Product name | Truncated to one line |
| SKU | Shown below the name |
| Unit price | Price per unit (on wider screens, cost price is also shown) |
| − / qty / + | Quantity controls |
| ✕ (red) | Remove this component |
Decreasing a component's quantity to zero removes it from the list.
Once components are added, the Search Products and camera buttons move to the bottom of the list so you can keep adding.
Tap Next to proceed. The Next button is disabled until at least one component has been added.
Step 2 — Name the package
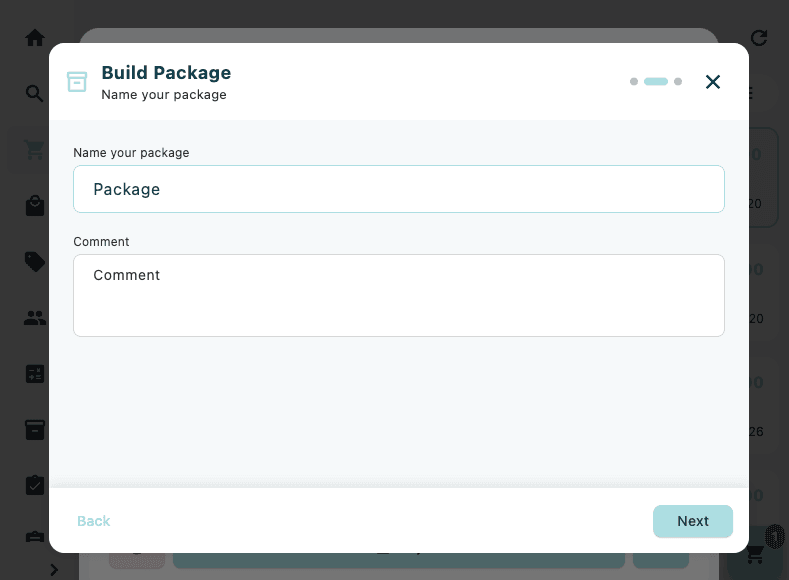
The second step is labelled Name your package.
| Field | Description |
|---|---|
| Name | Pre-filled with Package — edit to give the bundle a descriptive name |
| Comment | Optional free-text note (up to 3 lines) shown on the receipt |
Tap Next to proceed to the price step.
Step 3 — Set the price
The third step is labelled Price Overview. The top section shows a read-only summary of all components with their quantities and line totals. The Subtotal (sum of all component prices) and total Cost Price (if available) are shown.
Below the summary, three linked pricing fields let you apply a discount:
| Field | Description |
|---|---|
| Discount % | Enter a percentage discount — the other two fields update automatically |
| Discount Amount | Enter a fixed discount amount — percentage and final price update |
| Final Price | Enter the final sale price directly — discount amount and percentage update |
All three fields are linked: changing any one recalculates the other two in real time.
The Margin field (read-only) shows the calculated margin in currency and percentage. Tap the info icon next to Margin to see a detailed breakdown:
| Row | Description |
|---|---|
| Final Price | The entered final price |
| Tax Rate % | The market's default tax rate |
| Price excl. tax | Final price with tax removed |
| Cost Price (−) | Total cost of all components |
| Margin | Price excl. tax minus cost — shown in green (positive) or red (negative) |
Tap Add Package to add the package to the cart. A loading spinner is shown while the request is processed.
How the package appears in the cart
Once added, the package appears as a single parent line in the cart with a collapsible expand toggle. The package type label (Package) is shown below the product name. Tap the label to expand or collapse the component lines, which appear indented below the parent.
Configuring a catalogue bundle
When a bundle or package product from the product catalogue is added to the cart (via scan or search), a Configure Package option becomes available in the item card's context menu.
Opening Configure Package
- Tap the left side of the bundle's item card.
- Tap Configure Package in the context menu.
- The Configure Package dialog opens, showing the package name and a list of its component slots.
Selecting components
Each component slot shows:
- The component name and an optional image
- The current selection (if already resolved to a specific SKU)
- A Change button if alternatives are available
Tap Change on a component to select a different variant from the available options. If the component slot is required (indicated by an orange border), a variant must be selected before you can proceed.
When all required components are configured, tap Break Down Package to apply the selection. The package is broken down into its individual component lines in the cart, shown with the label Package (Broken Down).
The Break Down Package button is disabled and a warning message — All required components must be configured — is shown until every required component has a selection.
Resetting a broken-down package
If a package has already been broken down, the item card shows the label Package (Broken Down). To restore the original package configuration:
- Tap the left side of the item card.
- Tap Reset Package in the context menu.
- A confirmation dialog appears: This will reset all components back to the original product configuration. Are you sure?
- Tap Reset Package to confirm.