
Print from Home
Print receipts, gift receipts, or other documents for an order or order line directly from the Home screen without opening the order detail view.
Print Template tiles on the Home screen let staff reprint a document for any order in a few taps — without navigating to the order detail view. Each tile is linked to one or more receipt templates and can optionally prompt staff to choose specific line items before printing.
A manager sets up each tile once in Settings → Home Blocks. Multiple print tiles can exist side-by-side, each configured for a different document type — for example a sale receipt tile and a gift receipt tile.
Prerequisites
- You are signed in and the device has completed Initial Device Setup.
- A manager has added at least one Print Template block to the Home layout — see Configuring the Home Blocks.
- At least one receipt template exists in the tenant — see Receipt Templates.
- A receipt printer is paired and configured on the device.
Printing from a tile
-
On the Home screen, locate the print tile you want to use (for example, Sale Receipt or Gift Receipt). The tile shows an icon and the configured name.
-
Tap the tile.
If the tile is linked to more than one template, a small popup menu appears just above the tile. Tap the template name you want to use.
-
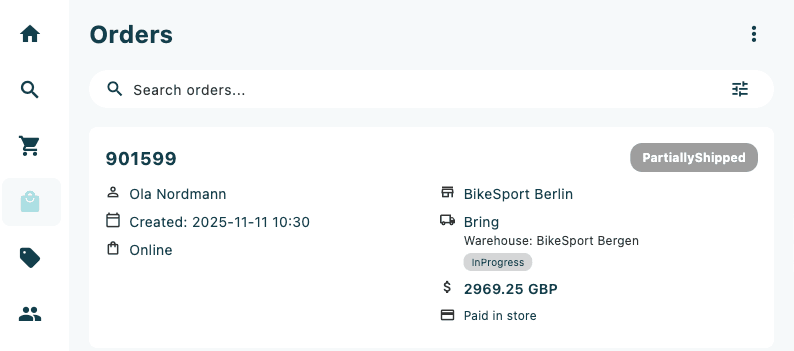
The Select Order dialog opens. It pre-loads the 20 most recent orders under a Recent Orders heading.
-
Find the order you want to print for:
- Scroll the list and tap an order row directly, or
- Tap the search field (auto-focused on open) and type an order number or customer name. Results update automatically about 0.4 seconds after you stop typing.
-
Tap the order row. The dialog closes and the app fetches the full order in the background (a loading spinner appears).
If the order has more than one shipment, a sheet slides up titled Select Order with a list of the available shipments. Each row shows the shipment name and item count. Tap the shipment you want to print.
-
If the tile has "Select order lines" enabled, the Select line items dialog opens. All line items are pre-ticked. Untick any lines you want to exclude, then tap Confirm. (The Confirm button is disabled until at least one line is selected.)
-
A loading spinner appears while the receipt is sent to the printer.
-
On success, a snackbar confirms: Receipt printed successfully.
Searching for an order
Inside the Select Order dialog, the search field is auto-focused so you can start typing immediately. The placeholder reads Search by order number or customer….
- Type part of an order number (with or without the
#prefix) or the customer's name. - Results refresh automatically while you type.
- To clear the search and return to the recent-orders list, tap the × that appears at the right of the search field, or delete all the text.
- If the search returns nothing, the list shows No orders found.
Selecting line items (optional)
When a tile has the Select order lines option enabled, the Select line items dialog appears after you choose a shipment. This lets you print a partial receipt — for example, one product from a multi-item order.
| Element | Behaviour |
|---|---|
| Select all checkbox | Ticks or unticks every line item at once |
| Individual checkboxes | Each line shows the product name, quantity, and extended price |
| Confirm button | Sends the job to the printer; disabled if no lines are ticked |
| × (top right) | Cancels the print entirely |
All lines are pre-selected when the dialog opens, so if you want to print the full shipment you can just tap Confirm straight away.
.12734e82.png&w=3840&q=75)
Variations
Tile linked to multiple templates
If a tile has more than one template assigned (for example both a full receipt and a gift receipt), tapping the tile shows a small popup menu with one row per template. Each row shows a receipt icon and the template name. Tap the name to continue with that template.
Order with multiple shipments
If an order has been split into more than one shipment (for example, in-store pickup and a delivery), a bottom sheet slides up after you select the order. Each row shows the shipment method name and the number of items in that shipment. Tap the shipment you want to print for; the sheet closes and printing proceeds from that point.
No printer configured
If no printer is set up on the device, the print attempt fails immediately with a snackbar: No printer configured. Ask a manager to configure the receipt printer in Settings.
Print failed
If the printer is configured but the job fails, a snackbar shows Print failed: followed by the error detail. Check that the printer is powered on and connected, then try again.
Configuring a print tile (managers)
Managers add and configure print tiles from Settings → Home Blocks.
Adding a new tile
-
In Settings → Home Blocks, tap the + button in the top right.
-
Select Add Print Template from the menu.
-
The Add Print Template screen opens. Fill in:
Field Description Tile Name The label shown on the tile. Leave blank to display Print Template as the default. Icon Tap to open a grid of available icons and select one. Defaults to the receipt icon. Select order lines Toggle on to prompt staff to choose specific line items before each print job. Off by default. Select Templates Tick one or more receipt templates to link to this tile. Use the search field or the All / Sale Receipt / Other filter chips to find templates. At least one template is required to save. -
Tap Save in the top right. The tile appears in the Home Blocks list.
Editing, moving, or deleting a tile
In Settings → Home Blocks, tap the tile to open its options:
- Move up / Move down — change where the tile appears in the Home layout.
- Edit — reopen the configuration screen to change the name, icon, templates, or the Select order lines toggle.
- Size — choose Small, Medium, or Large to change how many grid columns the tile occupies.
- Delete — remove the tile. A confirmation dialog appears first.