
Pick Lists
Group, pick, and ship the items required to fulfil customer orders.
A pick list groups the items that need to be located and prepared for one or more customer orders. Staff work through pick lists to fulfil online and Click & Collect orders from store stock.
The Pick Lists feature has two tabs: Pick Lists for managing existing lists and creating new ones, and Orders to Pick for seeing individual orders awaiting fulfilment.
Pick list lifecycle
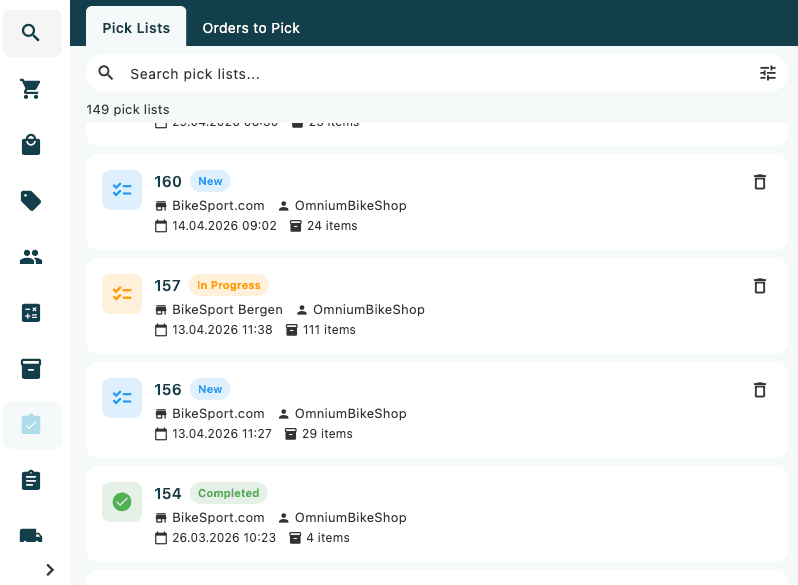
Each pick list moves through the following statuses:
| Status | Colour | Meaning |
|---|---|---|
| New | Blue | Created but picking has not started |
| In Progress | Orange | Picking is underway |
| Completed | Green | All items picked and orders updated |
| Transferred | Purple | Pick list transferred to another system or fulfilled externally |
Tap Set In Progress to begin picking. When all items are accounted for, tap Update & Complete to finalise the list and update the linked orders.
Creating a pick list
Pick lists are created from the Orders to Pick tab. Select one or more orders, then use the floating action button to add them to a new pick list or to an existing one. The app navigates directly to the new pick list so picking can start immediately.
Picking items
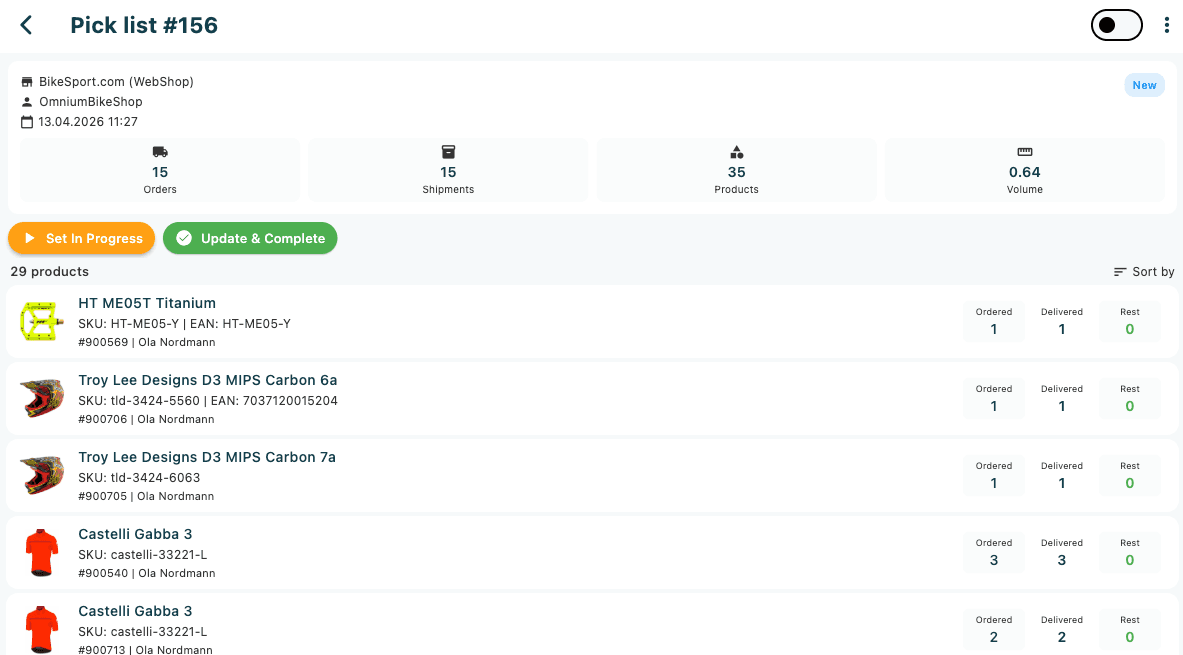
Inside a pick list, toggle on Enable Picking (top-right switch) to activate quantity controls on each item. Items show three quantity columns: Ordered, Delivered, and Rest (remaining to pick). Adjust the delivered quantity for each item as you locate it, or use Quick Pick to set the full ordered quantity in one tap.
On mobile, the camera scanner is available from the overflow menu. On devices with an RFID reader, an RFID locate function lets you pinpoint an item by RFID proximity.
Printing a pick list
From the overflow menu on the pick list detail page, choose Print Thermal to send the list to a paired receipt printer, or Print PDF to generate a printable PDF. A thermal printer must be configured in Hardware Settings before the thermal option will work.